Posts mit dem Label Preussen werden angezeigt. Alle Posts anzeigen

Dienstag, 8. Juni 2021

Workbench: SYW flats plan and progress tracker

This post is my current todo lists for SYW flats. I'll try to remind myself which minis I have bought, cleaned up (remove flash and rinse with soap), basecoated, painted, varnished and based, and try to plan out a good mix of poses for future purchases.

1. Zinna leftovers

Imperial army
  • Hessen-Darmstadt (1 bn): 1st half cleaned up for priming Sept.22
  • Württemberg (1 bn): done (pics to follow)
  • Baden-Baden (2 bns): done
  • Ernestinisch Sachsen (2 bns) - group 65-1 ready to fire - wild mix of uniforms. Done.
Not really part of the Zinna OoB, but rounding off:
  • Esterhazy Hussars: bought (same group as Nadasdy), first half painted
    • plan is to use the uniform info from kronoskaf (but correct uniform color towards the normal sky blue in the FB photos) and flags from here and here

2. first Paltzig brigades

Here I will also try to list the series number of the minis used to remember what is what.

Russians

I want to paint these in summer uniform without coats as far as possible. The good news is that this speeds up painting and creates a nice visual effect, quite different from the blue coats dominating the look of my current armies. The bad news is that infantry units all look alike, the only distinguishing factor is the flag design. So I wonder when it will get boring.

I will try to list the units from my initial selection in the order in which I want to buy and paint them to keep things interesting.

  • 2nd Moskovskiy (2 bns): group 262 advancing done
  • 1st Grenadiers (2 bns): bought from KILIA, 1st half bat. painted, another half cleaned up for priming Sept. 22
    • original idea was to use Grünewald group 252 firing, probably using the old/new classic hats not the weird 1757 ones. BUT: Grünewald only has Grenadiers with coats, not the ones in summer uniform :( so use the ones from Kieler Zinnfiguren, they even have the early, weird hats.
  • Gruzinsky Hussars (1 unit): bought from KILIA (Austrian Hussars firing, to be used in skirmisher setup)
    • note that according to Funcken, the Russian hussars were modelled on the Hungarian ones in the Habsburg army
  • Artillery (1 bat): later, maybe from www.zinnfiguren-kw.de
  • Sibirskiy (2 bn): maybe group 261-2 Reserve, from Schum
  • Kazan Cuirassiers: later
  • Cuguev Cossacks: later, check http://www.zinnfiguren-schum.de/ for a few very nice minis
    • Austrian Pandurs bought from KILIA, let's see whether they could be used for Russian Pandours, too
Prussians
  • Lestwitz (2 bns): to be bought (firing) group 65
  • Artillery (1 bat): to be bought (other size than what I currently have, tbd)
  • Nesse Grenadiers (1 bn): to be bought, maybe advancing group 82
  • von Beyer Grenadiers (1 bn): later
  • Jung-Sydow (2 bns): later

3. first Korbitz brigades

Prussians
  • Horn Cuirassiers (from Korbitz OoB): later, start here to balance the lack of cav in the Paltzig increment
  • Jung-Platen Dragoons: much later
  • Dingelstedt Hussars: much later
Austrians/Imperials
  • Gyulay (2 bns): later, Hungarian inf with blue breeches
  • light Kurmainz artillers (1 bat): later, use Kurmainz handlangers
  • Banal Nr. 2 Grenzers (1 bn): later
  • Alt-Modena Cuirassiers (1 unit): much later
  • Marschall (2 bns): much later
  • Zweibrücken-Birkenfeld Dragoons (1 unit): much later

Freitag, 28. Mai 2021

Preussische Artillerie


Zusammen mit den Nadasdy Husaren kam auch das noch fehlende Geschütz für die Preußen aus der Lackiererei. 

Alle Bauteile in der Schachtel (ich mag den Old School Anblick von Zinnsoldaten in den kleinen Pappschachteln). Links das halbplastische Geschütz: das Rohr ist vor Bemalung zwischen eine zweiteillige Lafette geklebt, die Räder sind noch einzeln.

Dieses ist mein Experiment mit den sog. halbplastischen Modellen von Grünewald. Unbemalt fand ich die Einzelteile wenig attraktiv, zusammengebaut sieht es besser aus als ich dachte. 

Ich denke aber, in Zukunft bleibe ich doch bei den einfachen flachen Geschützen, ich sehe keinen echten Vorteil, der den Mehraufwand für die halbplastische Variante rechtfertigen würde.

Zum Vergleich hier die komplette erste, mittelschwere Batterie für meine Zinna-Preußen, vorne ein normales flaches Geschütz und hinten das halbplastische.

Mittwoch, 4. November 2020

Slow-Mo Piquet: Game 4, the story without the die rolls


As for previous Piquet games (here and here), after detailed game logs with all initiative pips and die rolls which are more for my own reference, I also want to post one summary with the story of the battle as it evolved.

You can click on the pictures to see a larger version, as always.

The previous two battles were kind of meeting encounters between retreating troops and the vanguard of the pursuers. This time I wanted to go for a classical linear battle, as outlined in the setting.

So as planned, the first few turns here and here were spent marching the armies on the table in long march columns organized by wings. 

The Empire received an extra move card as part of the army characterization, and were allowed to march on the table in two parallel columns. Although the Prussians stole a march on them in turn one with a timely heroic action, overall it began to show soon that the Empire would be deployed into line formation before the Prussians were ready. 

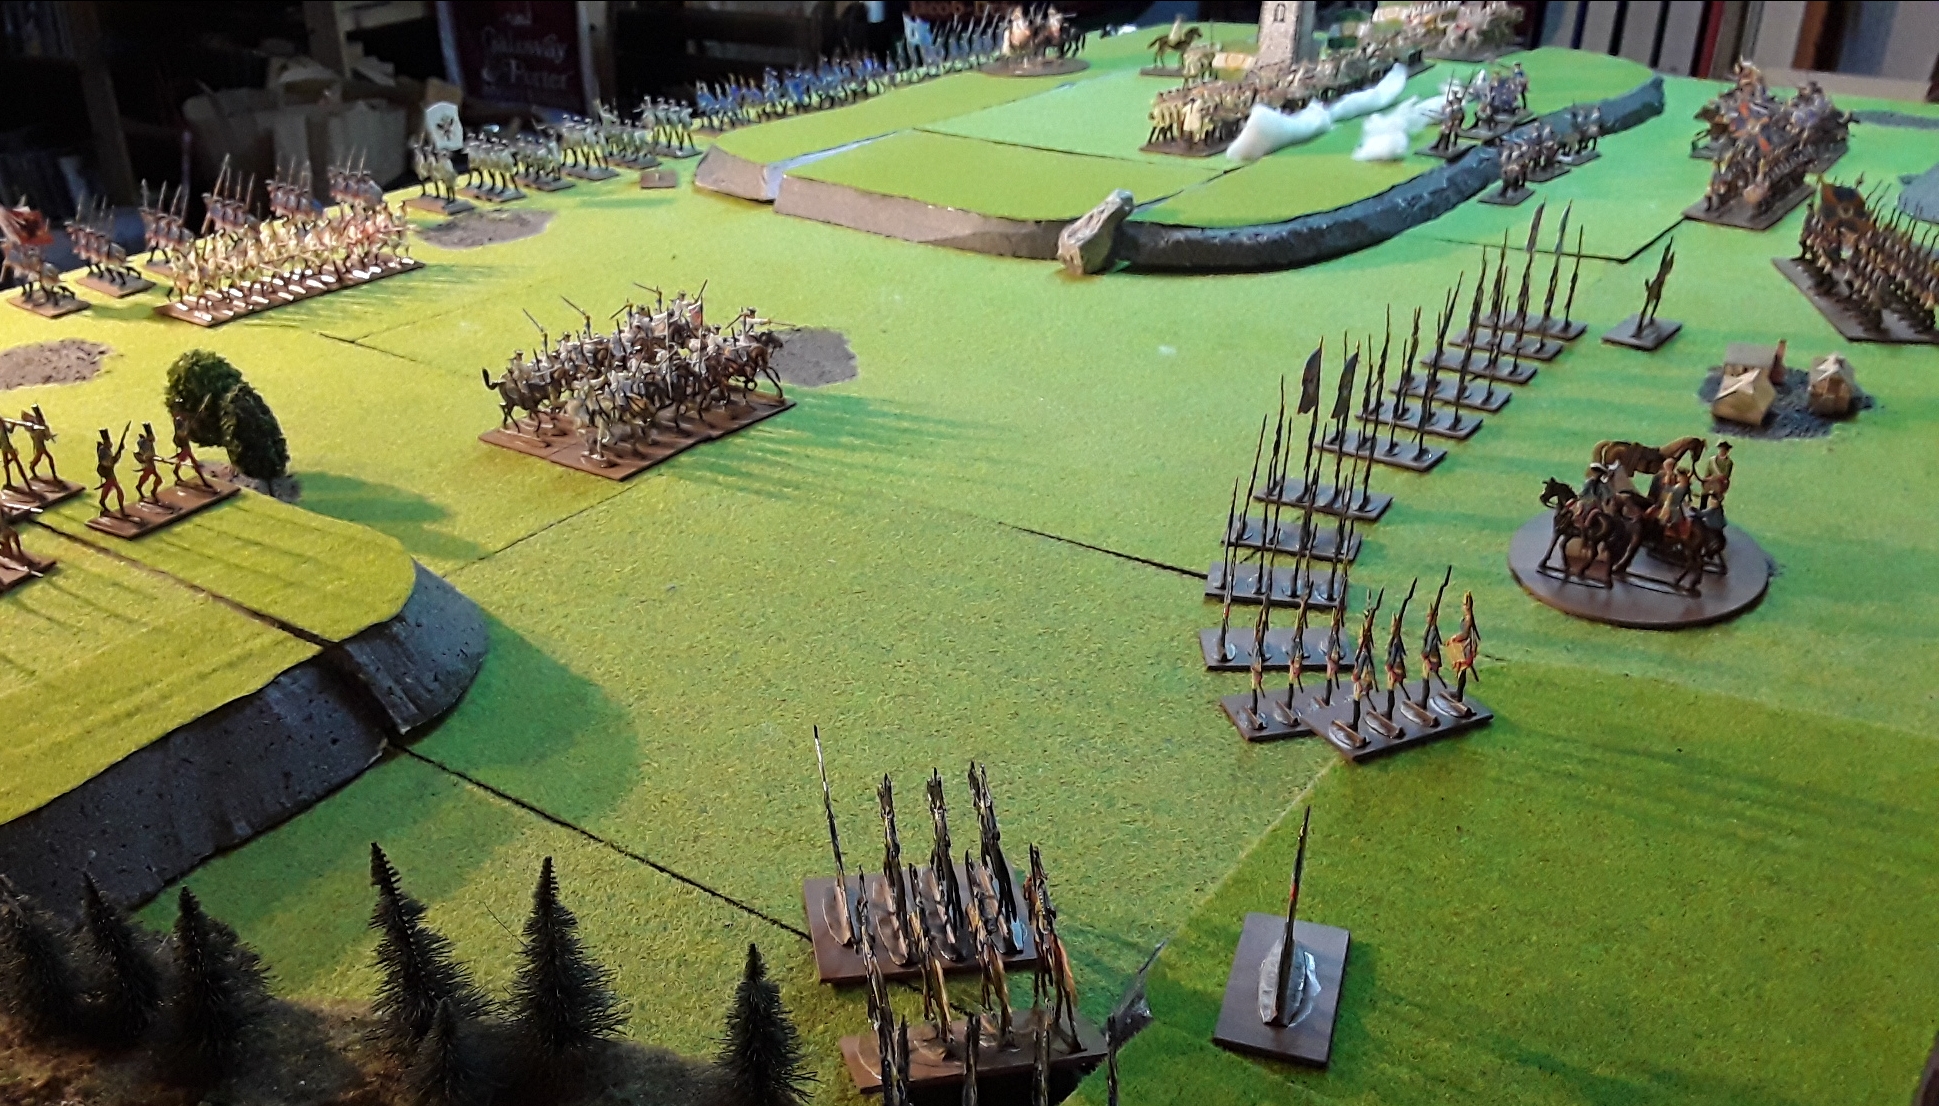
At the end of turn three, the Empire infantry on the right are already starting to form into line formation while the infantry intended for the Prussian center are still marching (dangerously close to the enemy cavalry in front of the villages on their side). On the Prussians far right, the skirmishing Frei infantry keep the deployed line of three Kurmainz battalions in check.

As you can see in the picture above, the Empire's Ansbach Dragoons are closing in on the Prussian infantry center while they are still in column of route. The Dragoons wasted no time and brushed one Prussian Fusilier battalion off the table with a quick charge. 

On the left and in the center, the Empire had formed line before the Prussians did, but got stuck in a fruitless firefight and, eventually, in a fatal attack where two (!) Kurmainz battalions were pushed back by the skirmishing Wunsch Frei-infantry, one of them even routing off the table in total disarray.

The protracted firefight on the Empire left. Frustrated because they completely failed to impress the opposing skirmishers, the Kurmainz battalions charge and are beaten back soundly by Wunsch.

In the center (as on the unfortunate left) the Empire is evolving its columns into line formation ahead of the Prussians, with the reformed Dragoons holding the Prussian Hussars at bay.

Things are very crowded, though, as the Empire struggles to develop two mutually supporting lines.

A view of the Empire center, which is actually getting crowded as the Empire reserves already advance to take pressure of their unlucky left flank units. The Croats have advanced to the tip of the hill on the Empire right.
The Ansbach Dragoons try to force another hole into the still forming Prussian line, but are thrown back by the Malachovsky Hussars who cause a one base loss with a timely counter attack.

The situation after the cavalry clash on the Empire right flank
In turn 6, there is general fighting along the line, but mostly inconclusive fire back and forth. 

Then, the cavalry fight on the Prussians left flank escalates, with Malachovsky Hussars charging Ansbach Dragoons, routing them but breaking itself on the Empire Grenadiers behind the Dragoons. 

Prussian left wing after the cavalry fight - Ansbach Dragoons are runnimg off the table at half strength, Malachovsky Hussars have been wiped out by fire from the combined Kurmainz and Ernestinisch Sachsen Grenadiers.
On the Prussian right, the skirmishing Wunsch Freikorps continue their unbelievable heroics, routing a Kurmainz batallion in a very close melee (tied die roll resolved in favor of the attacking Prussians). 

The skirmishing Wunsch Freikorps watch their opponents turn from "line" into "run" formation

The resulting gap in the Empire's left flank, and even more in its depleted morale chip pool, essentially forces the Empire to retreat despite all of its valiant efforts and local victories. 

I have played out a little bit of that retreat, and it might be fun one day to complete a retreat until all losing units are off the table, but here the Empire line was still organized enough, and the Prussians so cautious, that it didn't seem worth the effort and I ended the game a few initiative rolls after this.

Empire troops are beginning to retreat, Prussian infantry advances cautiously as the Empire center still has full strength battalions firing at them.

Learnings for future games

I had to relearn most items from the last game:

  • cav units (not just elites) would have counted as two for army size determination - with my growing army sizes this is getting relevant as armies will get over the minimum three card allotment
  • cavalry charging skirmishers does not have to wait for cav move, they can attack on an (opportunity?) pip
  • movement in III/IV also allows all units more than 12" from an enemy to move (and all movement cards allow formation changes to such units). This is important if I play out the marching into battle.

And I ran into one new complication: I got confused how many morale chips can be lost in one melee. 

I saw some weird corner cases, like the Prussian battalion losing a melee by a factor of three (routing it) but with very low die rolls (few bases lost), so they were off the table with fewer chips lost than some Empire units who remained on the table and rejoined the fight after rallying, but lost multiple chips in high-roll, close results. 

For some time I thought there should be at most one morale chip loss per lost melee, not multiples for losing, becoming disordered, stand losses etc. But rereading the rules it seems clear that these chip losses add up, so a single unit with one or two unfortunate melee results can eat up five or more chips. Somehow this means that even if they remain on the table and not routing, a small number of damaged units can ruin the whole army's morale. 

I'll try to make myself believe that is historical until the suspension of disbelief fails even worse in future games. 

Montag, 5. Oktober 2020

Slow-Mo Piquet game 4: turn 6 - End


Turn 6 (let's say 10:30-11:00 a.m.)

Sequence decks: Prussians remove one card for the routed Fusiliers and one for the poor command. Empire remove one card for the routing Kurmainz battalion.

Phase 1, roll 1: 11:12, Prussians turn dud.

Roll 2: 14:5, 6:3 pips

Empire turn dud, reload, use it on 4/Kurmainz and fire them at Wunsch once more, D10 d1 disordered, u1 pb, d2 target skirmishing for D6:D6, 2:3 no effect.

Then turn skirmish move and move the Grenzers towards the wooded area on the very left of the Prussian flank, and turn Officer check (with no need to test anything).

Prussians turn difficult move (not usable for marching anymore as all units are within 12" of an enemy), dud, cav move.

Roll 3: 16:10, all remaining pips are split 7:3.

Empire move their HQ to the right, turn cav move, retreat the Dragoons, turn dud, heroic moment for elite reload. Fire the converged grenadiers in the center (despite long range) at the Hessen-Kassel Fusiliers at D10 up1 1st fire, d2 long range, D8:D8 for 3:7 no effect.

Prussians don't charge their Hussars into an even D4:D4 cav melee, instead turn - another cav move :(, and an infantry move. Use that on their reserve first.

Phase 2, roll 1: 18:20, Prussians don't move the center and right wing infantry and turn cav melee and dress lines instead.

Roll 2: 18:19, Prussians turn cav move.

Roll 3: 13:10, 2:1 pips.

Empire reload and fire the Grenadiers again, this time D6:D8 without 1st fire: 2:7 no effect.

Prussians hold back on the cav move and turn Officer check instead, with no need to roll for survival.

Roll 4: 18:18, the heroic elite reload for the Empire goes unused.

Turn 7 sees the same sequence deck changes as before.

Phase 1, roll 1: 5:1, 3:1 pips

Empire turn useless deployment, dud, dud (2 art moves...). Prussians turn dud, too.

Roll 2: 10:2, 6:2 pips.

Empire turn officer check, don't need a survival roll, try to bring the Dragoons back in command: D20 d1 disordered, d1 enemy within 1 move for D10:D8, 7:6 success. Spend a pip and a morale chip to rally the Dragoons D6:D8, 4:4 fail.

Empire then turn difficult move and use it on the Grenzers on the very right. Then turn dud, dud.

Prussians turn dud, diff. move.

Roll 3: 3:7, 1:3 pips.

Prussians turn reload, fire and reload Wunsch at 4/Kurmainz, at D10 u1 pb range, d1 disordered, 4:3 for no effect. Then turn inf move.

Empire turn dud.

Roll 4 for 3 remaining pips, 1:7. 

Prussians move their reserve, turn cav melee, refill their 4th opportunity pip.

Correction

Looking at the morale chip situation, I think I penalized the Empire troops to highly for their lost melees. Multiple chip losses for one melee seem overly harsh and, rereading the table in the Cartouche rules on morale chip losses, unwarranted. I think I need to return at least two chips for the Kurmainz unit and one or two for the Dragoons. Before rereading the rules and blow by blow, I'll return 3 chips to make it 8:15.

Phase 2, roll 1: 14:9, 4:1 pips

Empire turn cav move, skirmish move and use it on the Grenzers, turn inf move.

Prussians turn command decision (at one of the best possible times...)

Roll 2: 1:17, 12:3 (only 15 pips left)

Prussians turn dud, cav move, melee (choosing not to melee their skirmishers), reload. Fire the skirmishers at D10 d1 disordered, up1 pb, D10:D6 for 6:2, OOC. Reload and fire again, 6:1 just missing a better effect.

Then turn officer check and attempt to rally the Hussars at D20 d1 disordered, d1 rally, d1 enemy within 1 move for D8:D8 7:2 ok. Note they can't be brought under command as cav that left a mixed command.

Then turn skirmish move, but find their skirmishers are already in melee (and thus probably couldn't have chosen to skip their melee some time ago...). So turning continues with a useless maneuver, difficult move, and then a cav move.

Empire first rout their 2/Kurmainz, then move their reserve and right wing.

Phase 3, roll 1: 7:12, 1:4 pips.

Prussians charge and melee the disordered Dragoons with their Hussars. Hussars fight with D6, d1 blown, up1 charging, the Dragoons fight with D8 d1 blown, d1 -1 stand, d2 disordered for the minimum D4. Roll is 6:4, one more stand loss, Dragoons rout. Empire lose a morale chip (not multiples as I played earlier), Prussians get two bonus pips. The Dragoons rout through the Grenadiers who turn unformed. The Hussars are disordered, and roll to prevent pursuit D20 d1 disordered, d2 prevent pursuit, d1 one move range for D4:D8, failing the check 1:7. So they pursue the Dragoons 6 inches, hitting the Grenadiers on the way. 

As elites, the Grenadiers fire a volley (their first!) at point blank range, D10 up 1st fire, d1 unformed, up1 range, D12:D6, 4:1 for 1 stand loss.

Prussians then turn infantry move. They move their reserve. Next they would like to advance the right infantry wing to move Hessen-Kassel through their retreating skirmishers and attack the spent 4/Kurmainz. However, the Wunsch Frei infantry is stuck in melee and will have to fight first. They do that on the last available pip, attacking their disordered enemy without a card and with D8 up1 charging, d2 disordered, d2 skirmish = D4 vs D8 d2 disordered =D4, 4:4 tie broken in favor of the attacker, routing the Mainz infantry.

Another Kurmainz battalion turns tail and runs, routed by the fearsome Wunsch skirmishers. 

Rereading the rules on morale chip losses I think these are cumulative, after all. I don't quite get it, because this treats a unit routing unralliably after a one stand loss in a 4:1 result much easier than a unit that loses two stands and rallies later, but whatever. I will remove the three morale chips from the Empire again which I corrected earlier, remove one from the Prussians for the Hussar stand lost to fire, and now 3 more from the Empire for losing a melee and routing with a 1 stand loss, so they only have a single chip left.

Empire use their one pip to let the Grenadiers melee the Hussars who pursued into them in disorder: D8 up1 charging, vs D6 down lots for disordered, lost stands etc. D10:D4, 9:1, the Hussars are wiped out for a chip loss of 1 (lost melee) +3 lost stands. Not sure another chip makes sense for routing the non-existing unit, but I'll award it to keep things a bit more interesting.

The Empire right wing is now devoid of cavalry - Ansbach Dragoons are runnimg off the table at half strength, Malachovsky Hussars have been wiped out by the Kurmainz and Ernestinisch Sachsen Grenadiers.

Roll 2: to be cont'd...

... or not? Looking at the morale situation with 1:8 chips remaining, I guess all that is left is a withdrawal of the Reichsarmee. I guess I'll first have to pass a player morale check before I play that out.

So let's take stock. At the moment, unit losses relevant for a major morale check would favor the Prussians. Although they have lost two units completely (one Fusilier battalion and the Hussars), the Prussians currently have three routing units and only one morale chip, i.e. one chance to rally one of them. The Empire would have to tie the Prussians by rallying one Kurmainz battalion, or routing another Prussian unit anywhere, to avoid their next Major Morale check.

Currently, this check would be a D20 having to roll >1, but only if there is a morale chip left to pay for that (so no more rallying for now). I guess the odds to make the first roll are ok, but as soon as the Empire loses a morale chip to something else their army will crumble quickly.

So the best the Empire can do is beat a fast and efficient retreat. I don't think I'll play that out, but will start to see how quickly things go south. So the goal is: don't spend pips on anything but retreating and maybe occasionally firing off a lucky salvo at the pursuing Prussians. Let's try that.

So Roll 2: 19:16, Empire turn a heroic... cav move to forced rout their Dragoons off the table.

Prussians advance their right wing and withdraw the heroic Frei infantry.

Roll 3: 11:17, 2:4 pips.

Prussians fire at their right wing opponents. 1/Hessen-Kassel at the routing Kurmainz infantry, D10 up1 1st fire, up1 rear, and I'll ignore formation modifiers for the target as they are currently half way between disordered line and routing column of march. D12+1 vs D6 is 3:4, no effect.

2/Hessen Kassel fire at the Grenadiers, D10 up1 for 4:1, one stand and the last morale chip gone. Then advance their reserve (now the left wing) but not the Fusiliers in the center. The left most Grenadiers stay back to face the Grenzers in the forest. These fire at the Grenadiers, D10 up1 1st fire, 10:4 disordering the Grenadiers, making them ooc and costing a morale chip (still 7 left for the Prussians to none for the Empire).

The Prussians then turn cav melee and maneuver.

Empire turn elites reload, but keep that active for later and refill one opportunity pip.

Roll 4: 4:14, the remaining 6 pips go to the Prussians.

Prussians turn a heroic deployment with no use, and another infantry move. They use it on their right wing to charge the routing Kurmainz battalion and the Grenadiers. 

They immediately melee Kurmainz at D10 up1 charging, up3 rear for D12+3 vs D10 d1 stand loss, d2 disordered for D4, 6:3 for 1 stand loss, 2 pips and 2 morale chips to the Prussians (lost melee, stand loss) and a 3" retreat.

They turn dress lines and an officer check. The commander loss roll is a 14, no problem. They try to rally the victorious Fusiliers, D20 d1 disordered, d1 rally, d1 enemy within one move for D8:D8, 5:3 ok. Then try to assert command over them, D20 d1 for enemy distance, 2:4 fails. The poor CiC tries to rally the Grenadiers on the left wing, D20 d1 poor, d1 disordered, d1 rally, d1 enemy near, for D6:D8 for 3:1 success.

On their right wing, the Prussians start to advance and drive the crumbling Empire left off the table 

Phase 3, roll 1: 18:8, 7:3 pips.

Empire reload both Grenadier units, and immediately fire the Grenadiers facing Hessen-Kassel in the middle of the fire fight shown above. D10 d1 stand loss, up1 range, 3:5 no effect.

They refill an opportunity pip, turn musket reload, use it on the Grenadiers and fire at Hessen-Kassel again, this time for 4:3 and again no effect.

Prussians turn dud and musket reload, use it on Hessen-Kassel.

Roll 2: 3:12, 3:6 pips. 

Prussians reload Frei and 1/Hessen-Kassel, then fire 2/Hessen-Kassel at the Grenadiers D10 up1 range, 4:5 no effect. It must be raining.

They turn cav move, Officer check. No casualty roll needed. But try again to bring 1/Hessen Kassel in command at D20 d1 enemy range, 9:2 ok.

Empire turn dud, maneuvre, cav move.

Roll 3 for one pip: 3:18, Prussians try to assert command on the Grenadiers on the very left, with another d1 for the poor commander, 8:8 no.

Phase 4, roll 1 (only 1 card left in the Prussian sequence deck...): 3:6, 1:2 pips.

Prussians advance their brigade commanders, Empire turn melee resolution.

Roll 2: 11:18, 2:5 pips. Prussiand turn their last card to end the turn before the Empire Grenadiers can melee Hessen-Kassel...

Turn 7

Sequence decks: Prussians are two units down, Empire 3. Both sides add a major morale check (one turn late). 

Thinking about what the armies will try to do this turn I can't see much that is worth playing out anymore. The Empire will retreat as fast as possible, and the Prussians will not be willing to follow too aggressively, risk taking close range defensive fire while trying to charge the retreating units. So I'll leave the march off the table to the imagination of the reader and consider things a clear Prussian victory despite valiant efforts of the Empire to seize the initiative and make the best of the day.

Mittwoch, 9. September 2020

Piquet unit values revisited


Playing through my fourth Piquet game (starting here) I got confused by my own notes on unit BDVs.

In my first attempt to summarize house rules, I listed based on a starting BDV of 6 and the Cartouche default unit shifts on p.68 ff of the rule book.

And in my recent roll call of minis painted so far, I noted unit BDVs based on geenric defaults and with some historical adjustments to reflect the general prejudice on unit qualities.

Between the two, the values for Prussians match. But for the Empire, they don't. And I don't think I would have remembered the Russian ind/art up1 morale.

So I want to try again here and hopefully come to a more consistent result.

1. Infantry

1.1. Guard Infantry 12-10-10

Should be rarely used for scenario specific situations only.

1.2. Elite Infantry 12-8-8

Typically used for Grenadiers and rarely for other elite units.
Prussia: Grenadiers
Empire: good Grenadier units
Austria: good Grenadiers
Russia: Grenadiers, at,12-8-10

1.3 Regular infantry: 10-8-6

Typically used for normal, experienced infantry units
Prussia: Musketeers, Fusiliers, good Freikorps (e.g. Wunsch)
Empire: average Grenadiers, good line infantry (e.g. Guards, units having a generally good reputation or a good day, maybe first battalions of larger regiments like Kurmainz just for variation)
Austria: average Grenadiers, line infantry
Russia: Musketeers, 2nd rate Grenadiers (e.g. observation corps) at 10-8-8

1.4. 2nd rate infantry: 8-6-6

I'm hesitating to use the "trained militia" category here. I will use this not for hastily raised militia, but for the average or below-average units of more or less professional armies like the Empire and Austria.
Militia would be 10-6-6, i.e. same firing effectivity as regulars but worse in melee. On the other hand, 2nd rate militia with 8-4-4 seems to punish melee and morale too much. So I will reduce both combat stats, and leave morale at 6 unless some special circumstances need to be reflected on top.

Prussia: rarely used, e.g. for 2nd rate Freikorps, garrison troops
Empire: all not-so-good infantry
Austria: rarely used for bad infantry, e.g. loans from not-so-professional armies.
Russia: rarely used for bad infantry, e.g. observation corps at 8-6-8

1.5. Specials

For now, I only see one special case that doesn't fir the categories above. Maybe if I get to larger Jäger units (Russians, perhaps?) I will add more here.

Habsburg Grenzer units which are less effective at firing, but tough. As per Cartouche army lists, they should be "Elite Natives", i.e. 10-10-6.

2. Cavalry

Not much to vary here, except maybe an attempt to show the better quality of the early war Austrians and the improvements of the Prussians over time. But maybe it is better to do this via the sequence deck, e.g. with additional cavalry move or cavalry melee cards, not via the unit stats.

2.1. Hussars (light cavalry) x-6-6

Empire: second rate Hussars might be x-4-6
Austria: early war / veteran Hussars might be x-8-8 as per Cartouche army list (elite light cav)
Prussian army list shows 50% chance to be elite x-8-8

2.2. Dragoons (medium cavalry) x-8-6

Empire: second rate Dragoons might be x-6-6
Austria: early war / veteran Dragoons might be x-10-8, but only a sixth chance per Cartouche army list.

2.3. Cuirassiers (heavy cavalry) x-10-6

Empire: second rate Cuirassiers might be x-8-6
Austria: early war / veteran Cuirassiers (50% chance per army lust), and converged Carabiniers, are x-12-8

2.4. Russian Cossacks: Regulars x-4-6, Irregulars x-4-4

I'll want to have at least two categories: reliable, trained "professional" units and the truly irregular troops which basically had no battlefield role (but a lot of value off the battlefield). Cartouche has 50/50 trained vs 2nd rate militia.

2.5. specials

I'll worry about other specials like converged Carabinier / mounted Grenadier batallions when I get there...

3. Artillery

As you can see in my latest roll call, I don't even have any artillery units yet. But I already know the basic prejudice I want to reflect, e.g. high quality Austrian artillery. Cartouche army lists shoe regularbartillery in all these armies.

3.1. Elite Artillery 10-4-8 (Light and Medium), 12-4-8 (Heavy)

Russians get up1 morale for 10-4-10 resp. 12-4-10.
Selected Austrian units

3.2. Regular Artillery 8-4-6 (Light and Medium), 10-4-6 (Heavy)

All Prussians, Russians, normal Austrians and selected Reichsarmee units

3.3. 2nd Rate Artillery 6-4*-4 (Light and Medium), 8-4*-4 (Heavy)

Use this for remaining Reichsarmee units.
Note: the 4* indicates values one "down 1" below D4 - the value can't go below but when I adjust the base BDV (D6) behind these values the 4* will first turn into a straight D4.

Samstag, 5. September 2020

Slow-mo Piquet: game 4, turn 4-5


First shots were already fired at the end of turn 3, while both armies were still deploying. Let's see how aggressively they continue in...

Turn 4

There are no casualties yet, so sequence decks remain unchanged and complete, except for one card removed from the Prussian deck for their poor commander.

Phase 1, roll 1: 16:2, 10:4 pips.

Empire turn infantry move. For the right wing, infantry speed is not enough to let the Dragoons charge home, so they only move the mandatory inch to avoid exposing their flank to the Prussian Hussars. The rest of the right wing and reserve move up and start forming into line.

As per the Piquet house rules, I will allow the 90° turn from column to line on a move command, even to the Prussians who have enemy cavalry approaching and should be even more motivated to pivot quickly.

Empire then turn dud, dud, cav move. This is when the Dragoons charge Hoffmann Fusiliers and catch them in column of march. This flank attack immediately disorders the Fusiliers, and can be resolved immediately without waiting for a melee resolution card.

The Dragoons get a D8 up 2 flank for D12, the Fusiliers defend with a D8 d2 disordered for the minimum D4. Roll is 5:2, one stand loss and doubled so the Fusiliers rout. 

The Prussians lose 4 morale chips (disordered, lost melee, lost stand, rout),but still have 3 more chips left than the Empire started with. The Empire gets two bonus pips for the rout. I forgot to mark them out of command for leaving the command group, will do that now.

The victorious Dragoons are blown and disordered after melee, and roll their morale D6 vs D10 for routing infantry to check pursuit. They check successfully 6:2, and use the 2 bonus pips to retire one move to get out of the Prussian Hussars' way. They will be blown but good order on their next move.

After all this excitement, the Empire next turn dud, melee resolution, dud, dud.

The Prussians see cav melee, dud, reload and use that for the Frei infantry.

Roll 2 for 6 remaining pips: 17:11, all 6 go to the Empire.

They turn cav move amd let the Dragoons inch towards the right, threatening the Hussars and giving the Grenadiers behind them a bit more space.

Then turn dud, elites reload, native mobility (not used to keep the Grenzers in command), and dud.

Phase 2, roll 1: 18:7 for 8:3 pips.

Empire see inf move, move their right and reserve. The leftwing stays put. 

Next they turn officer check. They move the C in C towards the center, otherwise there's nothing to do.

Next they see cav melee, reload and reload the 2nd Kurmainz bat.

The Prussians turn a dud and infantry move. They have to rout Hofmann off the table first and leave the rest of the move to their next initiative. 

Roll 2: 1:8, 2:5 pips.

Prussians form line with their left wing, Then their reserve advances, still one move behind the left. On the right wing they advance Dossow Fusiliers a bit.

They turn a difficult move next and bring up their rear to catch up.

The Empire reload the 4th bat. Kurmainz, and fire the 2nd bat. at the skirmishers again. This time they fire D10 d1 for range, d2 at skirmishers. D4:D6 is 3:1 for no effect.

Roll 3 for the last two pips: 17:17 ending the turn.

Turn 5: Prussians replace two cards (poor commander, one unit lost) with duds.

Phase 1, roll 1: 13:4, 5:2 pips.

Empire turn an unhelpful cav move, dud, deploy to wheel the Kurpfalz guards into line, and reload.

Prussians turn two duds.

Roll 2: 12:8, 3:1 pips.

Empire load and fire 2nd Kurmainz at the pesky skirmishers, D4:D6 for 1:3 no effect, and fire 4th Kurmainz at 4:2 still no effect but to be reloaded.

Prussians turn Maneuver.

Continued, but ineffective, firefight between Kurmainz and the Prussian skirmishers in the center 

Roll 3:  8:10, 2 Prussian pips to let 2/Dossow swing into line and turn cav melee.

Roll 4:  5:3, 2 Empire pips reload 4th/Kurmainz, and turn a heroic moment.

Roll 5: 16:19, 1:2 pips.

Prussians urn tdud and their first command indecision at a good time (end of their initiative anyway). Apparently the staff work better than the general's poor quality would suggest.

Empire turn a dud, keeping the heroics dangling for...

Roll 6:  12:6, the remaining 2 pips go to the Empire to turn a useless heroic elites reload and a dud.

Phase 2, roll 1:  15:5, 7:3 pips.

Empire turn dud, cav melee, inf move for their right wing and the reserve. Then turn a dud and their bonus inf move.

Prussians turn unhelpful native move, inf move and first march the leading grenadiers on the table and advance the left wing Hussars.

Making the best of their extra infantry move card, the Reichsarmee is already filling the center with its infantry lines while the Prussian grenadiers are still marching on the table.

Roll 2: 14:11, 2:1 pips.

Empire advance their right and reserve. Prussians advance their rear.

(here, my lack of connectivity ate a few initiatives' worth of notes, including the first very exciting clash in the center where the Wunsch skirmishers saw off an attack by two Kurmainz batallions)

The first infantry melee in the center (spoiler: it didn't go well for the Empire...)

Phase x, roll 1: 9:2, 5:2 pips

Empire turn the Dragoons a bit to have the Malachovsky Hussars in front, turn a useless native move, Officer check. Barely make the Officer Survival (D20 roll of 3), don't waste chips and pips on the disordered infantry, turn Cav move and charge the Dragoons into the Hussars in another attempt to land a decisive blow.

Prussians turn another Officer check in a row, and a melee.

Roll 2: 6:18, 4:8 pips.

Prussians resolve the cavalry melee, with (counter) charge advantage: D6 up1 charging vs D8 d1 blown, 6:4 for one stand loss and a morale chip. The Hussars roll to prevent pursuit: D20 d1 disordered, d2 prevent pursuit, d1 for the nearby Dragoons for D6:D8, 6:4 and stay under control.

Then turn cav move, but keep the Hussars back (they would melee the Dragoons at a risky D4:D4). Turn cav melee, reload, use that on Frei, infantry move. Use that to turn the leading Grenadiers into line, and refill one opportunity pip.

Roll 3 for one remaining pip: 3:3, ending the turn.

End of turn 5, on the right flank: watched by the Grenzers on the hill on the left, and the Prussian HQ in the village in the back, Malachovsky Hussars have beaten back the Dragoons, giving their Grenadiers at the very right time to deploy in line.

On the left flank, one Kurmainz battalion is running away, two others with a cav unit on the end of the line for support barely hold the line against, well... a lonely Freikorps battalion in skirmish formation. All clichées 


Samstag, 29. August 2020

Slow-Mo Piquet: Game 4, turn 2 - 3


We continue the ballet moves to unfold the battle lines from turn 1

There are no changes to the sequence decks yet.

Turn 2, phase 1, roll 1: 20:13, 5:2 pips.

Empire turn and use native mobility for the Grenzers. Then turn inf move and move right and left wings.

Prussians turn two duds.

Roll 2: 4:5, Prussians turn deployment.

Roll 3: 13:17, 1:3 pips.

Prussians use the deployment to form the leading Frei batallion into skirmish formation. Then turn (and skip) cav move, then a difficult move.

Empire move up the rear.

Roll 4: 19:8, the remaining 8 pips go to the Empire who turn 2 useless cards and a maneuver and use that to turn the leading two Mainz batallions into line formation (I'll be generous and let them do that on one pip for the two units from the same group).
Then turn 3 duds and officer check.

The Prussian right wing starts to appear, led by the skirmishing Wunsch Frei-infantry and the Dragoons.

At the end of turn 2, phase 1, the Reichsarmee has more units on the table as both wings entered in two parallel columns. Right wing in front is led by the dragoons, followed by Mainz Grenadiers &Co. Left wing is led by the 2/ to 4/ bat. of Kurmainz infantry.

Phase 2, roll 1: 11:17, 2:4 pips

Prussians use three pips to move all three wings. Then turn Native mobility (not needed anymore as Wunsch won't advance more).

Empire pull their HQ back a bit in the face of th Prussian Freikorps, then turn dud.

Roll 2: 9:6, 2:1 pips

Empire turn difficult move, move their left wing first. 
Prussians turn Inf Move.

Roll 3: 7:9, 2 Prussian pips move the right and left wing.

Roll 4: 6:19, the remaining 9 pips go to the Prussians who move their rear, turn officer check for no action, 2 duds, a cav move they will skip, a dud, a maneuver used for 1 pip to form line with the right wing dragoons, and two reloads.

Phase 3, roll 1: 13:10, 2:1 pips. 

Empire move the right wing and reserve. 
Prussians turn difficult move.

Roll 2: 19:7, 8:4 pips.

Empire move the left wing. Turn and use inf move, starting with the left wing, then right wing and reserve. Turn cav move but skip it to keep the dragoons in the right wing group. Turn elites reload.

Prussians continue their move, and turn a dud.

Roll 3: 16:15, Empire use one pip to turn Dress Lines

Roll 4: 2:1, Empire turn dud

Roll 5: 20:10, the last 3 pips go to the Empire who turn Cav Move, another cav move and reload to end the phase.

Phase 4, roll 1: 9:20, 3:8 pips.

Prussians turn officer check twice, dud, maneuver. Maneuver the right wing infantry units into line formation. Turn dud, reload, heroic moment for... we'll see.

Empire turn Info move, move their right wing and reserve.

Roll 2: 19:8, the remaining 9 pips are 8:1.

Empire turn dud, officer check, reload, dud, heroic moment for a diff. move. Form line with the right wing cavalry with a heroic double move to threaten the Prussien columns, and Grenadiers, march up the rest.

Prussians turn a heroic cav move. They might have to use that to bring up their left wing cavalry to protect their infantry deployment...

Phase 5, roll 1: 10:14, 1:3 pips.

Prussians split off the Hussars from their left wing and let them do a double move. Then turn infantry move :(, and move up the left wing (leaving the reserve a move behind).

Empire choose not to end the turn yet (they only have one card left), but use the open difficult move for their right wing.

The first fire fight breaks out on the Empire left between two batallions of Kurmainz and the Prussian free Infantry of Wunsch.

Roll 2: 15:4, 8:3 pips. Empire move up their reserves, and advance their left wing to within firing distance of the Wunsch Frei infantry. As they march up, Wunsch uses an opportunity pip to fire at the 4th Kurmainz batallion on the right. They fire D10 d1 for medium range u1 for 1st fire, for 2:5 and no effect.

The two right most Kurmainz batallions fire back. 4th bat. on the right fires D8 u1 1st fire, d1 medium range, d2 for skirmishing target, D4:D6 for 1:4 no effect, the 2nd bat. in the middle rolls 4:4 also for no effect.

Empire then turn their last card, cav melee, to end the 3rd turn.

The table from the perspective of the last Prussians marching on the table (except for the reserve which is one move behind). the Empire Dragoons are dangerously close to the Prussian fusiliers still marching in column formation.


Donnerstag, 18. Juni 2020

Zinnfiguren OoB notes: Option 3 Paltzig


Ein Ausschnitt aus dem OoB der Schlacht bei Paltzig würde nur einen Bruchteil der beteiligten Einheiten abbilden, wäre aber eine Chance, die Russen in Sommeruniform (rote Westen, keine Röcke) zu zeigen.

Russen

Hier könnte man mehr Russen als (schon von Zinna vorhandene) Preußen malen. Vielleicht eine Infantriebrigade mit ein oder zwei Grenadiereinheiten und ein paar verschiedene Kavallerieeinheiten, einschl. paar Irregulären. 

Hier wäre die Brigade von Generalmajor Panin plus etwas Kavallerie und Artillerie:

 Einheit Bestand / Plan Kommentar
 2. Moskau 0/2 
 1. Grenadiere 0/2 Russische Grenadiere hatten wohl sogar eigene Fahnen, schön bunt :)
 Sibirien 0/2 
 Kazan Kürassiere 0/1 Zwar Kürassiere, trugen aber keinen Kürass (jedenfalls 1759 noch nicht). Sehen also aus wie Dragoner.
 Georgische Husaren 0/1 Etwas Farbe...
 Tschugujeff-Kosaken 0/1 Wenig Uniform-Infos, aber etwas irreguläre Kavallerie muss eigentlich sein
 Artillerie 0/1 

Preußen

Hier geht es um zwei Dinge: Wiederverwendung von Einheiten von Zinna (auch wenn sie nicht direkt in Paltzig waren) und eher etwas zu viel Infantrie, auszugleichen durch den Kavallerieüberhang von Korbitz.

Das geht am einfachsten, wenn ich die Nachhut unter Wobersow baue:

Einheit Bestand / Plan Kommentar
 Malachovsky Husaren 1/1 schon vorhanden
 von Beyer Grenadiere 0/1 könnten auch erstmal durch Willemey oder Burgsdorff dargestellt werden
 Lestwitz 0/2 das wären endlich mal preußische Musketiere mit Dreispitz, nicht immer die komischen Füsilierkappen. Und rosa! Sogar die Rockaufschläge!
 Jung-Sydow 0/2 Garnisonsbataillon, da könnte man in Piquet mal eine Leistungsstufe unter 1st Line gehen
 Nesse Grenadiere 0/1 kommen auch im Korbitz OoB vor
 Med. Artillerie 0/1 6-Pfünder

Fazit

Auch wenn mich beim Aufschreiben der Optionen die Sache mit den Braunschweigern, Hannoveranern und Württembergern echt gereizt hat: das hat einfach keinerlei Überlapp mit Zinna.

Von daher bleibe ich, denke ich, doch beim ursprünglichen Plan: einen Ausflug zu den roten Westen der Russen mit dem hier dargestellten Ausschnitt aus dem Paltzig-OoB, und wenn mir das dann langweilig wird, Ausbau der Zinna-OoBs mit den Österreichern und Kavallerie (auch für die Preußen) von Korbitz

Mal sehen, wie lange die Vorsätze erhalten bleiben...

Zinnfiguren OoB notes: Option 2 Korbitz


Die "weiter so" Option würde die Reichsarmee und die Preußen von Zinna weiter ausbauen. Wenn man sich am OoB von Korbitz orientiert, muss man eine Auswahl treffen (es waren dort mehr als dreimal so viele Einheiten wie in Zinna, das past weder alles auf einmal auf den Spieltisch noch passt es beim aktuellen Maltempo in die Zeit bis zu meinem Ruhestand).

Den Ausschnitt aus dem OoB würde ich gerne so wählen, dass
  • etwas Neues in der Reichsarmee passiert (Österreicher?)
  • idealerweise die Franken etwas aufgefüllt werden
  • die Einheiten von Zinna mit verwendet werden können
Bei den Preußen wäre Wiederverwendung vor allem auf dem linken Flügel (Wunsch) möglich, dann könnte man entsprechend mid Hadiks Mitte und Teilen des rechten Flügels anfangen.

Reichsarmee

 Herkunft Einheit Bestand / Plan Kommentar
 Ungarn Gyulay 0/2 ungarische Infantrie mit blauen Hosen
 Österreich Marschall 0/2 österreichische Infantrie
 Österreich Alt-Modena Kürassiere 0/1 
 Österreich Zweibrücken-Birkenfeld Dragoner 0/1 keine Infos zur Leibstandarte :(
 Schwaben Hohenzollern Kürassiere 1/1 schon vorhanden
 Kurrhein Kurmainz 4/2 nur 2 Bataillone in Korbitz
 Ungarn Banal Nr 2 Grenzer 0/1 
 Kurrhein Lt. Artillerie 0/13-Pfünder, Handlanger von Kurmainz und Option auf Aufstellung als Regimentsartillerie

Nächste Ausbaustufe könnte was sein wie:

 Herkunft Einheit Bestand / Plan Kommentar
 Österreich Pallavicini 0/2
 Österreich Andlau 0/1 nur ein Bat. in Korbitz - mehr Farbe mit einzelnen Bataillonen
 Österreich Angern 0/1 nur ein Bat. in Korbitz - mehr Farbe mit einzelnen Bataillonen
 Ungarn Warasdiner-Creutzer Grenzer 0/1 wacklige Uniform Info vor 1762, aber ein Bildchen auf kronoskaf
 Oberrhein Kurpfalz Kürassiere 0/1 Farbtupfer vom linken Flügel (Reichsarmee, und kombiniert aus zwei verschiedenen Einheiten mit verschiedenen Uniformen)
 Österreich Artillerie 0/1 

Oder ein Ausflug zu weiteren Reichstruppen, zB den Franken, vom linken Flügel. In Korbitz waren die scheinbar ziemlich komplett, wie auch der Rest der Reichsarmee auf dem sächsischen Kriegsschauplatz.

Preußen

Hier muss man überlegen wie man mit den "kleinen" Einheiten der Preußen umgeht, die meisten Infantrieregimenter waren ja auf ein einzelnes Bataillon zusammengeschmolzen und die Grenadierebataillone hatten Männer aus vier verschiedenen Regimentern.

Die Grenadiere würde ich eher in den normalen Aufstellungen malen, ob man bei den Musketieren und Füsilieren immer gleich zwei Bataillone auf einmal macht kann man dann immer noch entscheiden.

Wenn ich mich auf den linken Flügel konzentriere, habe ich die Infantrie schon fast komplett vom Zinna OoB, es fehlen nur noch:

 Einheit Bestand / Plan Kommentar
 Dingelstedt Hussars 0/1
 Jung-Platen Dragoner 0/1 
 Horn Kürassiere 0/1 
 Nesse Grenadiere 0/1 

Insgesamt würde meine preussische Artillerie dadurch etwas kavallerielastig, vielleicht lässt sich das bei dem Paltzig (Russen) OoB ausgleichen?

Montag, 15. Juni 2020

Flachfiguren: wie gehts nach Zinna weiter?


Ja, ich gebs zu, ich bin mit dem Zinnaprojekt immer noch nicht fertig, aber ich überlege trotzdem schon wie es danach weitergeht.

Die Grundidee, das OoB einer konkreten Schlacht zu nehmen, finde ich nach wie vor interessant. Nicht weil ich unbedingt die Schlacht nachspielen will, aber weil man dann eine irgendwie "realistische" zusammensetzung hat und sich nicht selber aus den Fingern saugen muss, wie viele und welche Einheiten welcher Kategorie man bauen will.

Die Menge der Einheiten in Zinna war so gerade eben "klein" genug um das Ganze noch als ein langes Projekt zu fahren. Größer sollte die Sache also definitiv nicht werden. Allerdings wäre es auch möglich, aus einem größeren OoB einer historischen Schlacht nur einen Teil rauszunehmen (einen Flügel, eine Linie oder so).

Die wesentliche Frage ist, an welcher Front und mit welchen Beteiligten ich weitermachen will: das in Zinna begonnene (Reichsarmee und Preußen) erweitern oder ganz wo anders anfangen? Also im Ergebnis Einheiten haben, die theoretisch auch mal gemeinsam auf dem Tisch stehen könnten, oder was ganz Neues beginnen (dann könnte das ja auch 

Wenn ich mal bei den frühen Kriegsjahren bleibe, finde ich folgende drei Optionen.

1. Ganz was anderes: westlicher Schauplatz

Hier ist mir zum Beispiel das Gefecht bei Fulda aufgefallen. 

Hier könnte man die Preussen um Hessen, Hannoveraner und Braunschweiger ergänzen und gegen Württemberger antreten lassen.

Vorteile
  • neuer Schauplatz, westliche Alliierte
  • Württemberger Armee fast komplett
  • könnte später mit Briten und Franzosen ausgebaut werden
  • nicht soo riesig (7 + 15 Infantriebataillone)
Nachteile
  • kein Überlapp mit dem bisher Erreichten
  • schlechte Quellenlage, zB scheint es für Hessen keine Infos zu den Flaggen zu geben

2. Fortsetzung von Zinna: Korbitz

Nur zwei Wochen nach dem Gefecht bei Zinna begegneten sich die Reichsarmee und die Preussen ein zweites Mal. Fast alle Einheiten des Zinna OoB waren wieder dabei, allerdings ergänzt durch noch das doppelte bis dreifache an weiteren Einheiten.

Das wäre der naheliegende schrittweise Ausbau der Armeen, mit denen ich angefangen habe. Gerade auf der Seite der Reichsarmee wäre das ja auch optisch recht attraktiv.

Vorteile
  • Fortsetzung und Ausbau des bisherigen Projekts
  • Möglichkeit, erste Österreicher hinzuzufügen
  • Möglichkeit, die Franken zu vervollständigen
Nachteile
  • reines "weiter so", nichts spannendes oder innovatives
  • viel mehr zusätzliche Einheiten auf einmal bringe ich ohnehin nicht auf den Spieltisch

3. Ausdehnung nach Osten

Eigentlich hätte ich Lust, auch die Russen ins Spiel zu bringen, einfach als Farb- und Schauplatzwechsel. Ein Kandidat dafür aus 1759 wären die Einheiten, die bei Paltzig aufeinandertrafen (oder zumindest ein Teil davon).

Vorteile
  • was neues
  • neue Farben (ich würde die Russen erstmal in den roten Westen machen, das müsste ziemlich gut aussehen und auch einfach anders als die vielen blauen und weißen Truppen die ich schon habe)
  • kombinierbar mit den bisherigen Armeen - zumindestens haben die Reichstruppen und die Russen ja paar mal versucht sich zu vereinigen
Nachteile
  • könnte schnell langweilig werden (die russischen Einheiten pro Waffengattung unterscheiden sich ja nur durch die Flaggen)

Fazit

Alles reizvolle Optionen, ich will mich aber nicht so verzetteln

Vermutlich drehe ich mal eine Runde mit den Russen, aber nur bis zu einer starken Brigade oder so, und gehe dann auf die Erweiterung des Zinna-OoBs zurück. 

Die westlichen Alliierten, Franzosen, Württemberger etc. interessieren mich historisch nicht so, das lohnt vermutlich die Ablenkung nicht. Wenn ich schon ein Projekt mache, das sich mit den bisherigen Figuren bis auf wenige preussische Bataillone ohnehin nicht kombinieren lässt, kann ich auch was ganz anderes anfangen (Napoleonisch, oder DBA oder so).

Als nächstes werd ich mal mögliche Einkaufs- bzw. Arbeitszettel für alle Optionen runterbuchstabieren und schauen ob sich das bestätigt.

Montag, 1. Juni 2020

New unit: Wunsch Freibatallion


When I wrote up my latest roll call update I realized how nice it is to have individual blog posts for each new unit.

So here are a few posts for the latest units that came off the painting table, starting with the Prussian Wunsch Frei Infantry. I recently finished one batallion shown in close order and executing peloton fire.

The new batallion Wunsch in a kind of peloton fire mode: the two stands in front are opening the cartridges by biting off the paper covers, exposing the back powder that will be put into the barrel before the bullet. The two middle stands have finished loading and wait for the command to prepare for firing. The stands at the back have inserted gun powder, the bullet and the paper wrapping of the cartridge and are pushing it all down tightly to the end of the barrel.

Here is the complete regiment, with one batallion skirmishing in open order, the other firing in close order and the commander on horseback.

The complete unit, skirmishers in front.

Sonntag, 17. Mai 2020

Slow-mo Piquet game 4: ratings and turn 1


Commander ratings

Prussians D20+2, rolling a 1 for a poor commander. Add a command indecision to their sequence deck.
Empire D20-2, rolling 15 for an average commander, no deck change.

Army characteristics

Prussians have 9 units, plus 2 for the two elite grenadiers. Draw the minimum 3 cards of 6 or higher: Cavalry Morale, Infantry Morale, 10. Discard Cavalry Morale, draw 9 for 19 morale chips and Inf. Morale up 1.

Empire have 11 units, plus 2 elites, and with a card divisor of 4 they also get the minimum three cards: 6, 7, Infantry Move. So 13 chips.

Terrain

I will treat the slopes of the higher hills in the corners as level III terrain, but the lower hills as kind of level I.5, i.e. stop on contact, move at normal speed and melee affect up 1 for the unit with the height advantage.

The grey marsh/stone patches and forests are level III, the brown earth patches are level II.

Turn 1

Phase 1, roll 1: 15:8, 5:2 pips
Empire turn Infantry move, bring up all three brigades. Turn another infantry move!
Prussians turn dud, cav move.

Roll 2: 1:9, 2:6 pips.
Prussians turn dud, infantry move, move all three brigades. Turn officer check.
Empire bring up the right and left wing columns.

Roll 3: 3:9, 0:5 pips.
Prussians move up their HQ, turn another officer check and advance their HQ into the Eastern village. Turn two duds.

The two Reichsarmee columns are starting to march on the table. In the background, Prussian HQ in the right hand village and the Prussian vanguard.

Phase 2, roll 1: 20:5, 10:5 pips.

Empire move their rear guard, turn dud, then maneuver - just a little bit too early to be of much use. Then turn 3 more useless cards and a cav move (but again too early to split off cavalry units from their command group's movement). Although they are still in march column, I will allow the Grenzers to make an extra move on that card. Then turn another useless reload.

Prussians turn dud, officer check for no action, dud, premature cav move, cav melee (which, I just noticed, also allows Prussian regulars to melee!).

Roll 2: 17:16 for a single Empire pip, turning - dress lines.

Roll 3: 2:8, Prussia geta the last 4 pips. Turn heroic moment for - a difficult move they can use to advance their troops as they are still far enough away from the enemy! I will apply the restriction to "one unit" to the whole right wing, and will charge them two pips for that. The last pip moves up the left wing.

Phase 3, roll 1: 2:6 for 1:3 pips.

Prussians move up their rear, turn another slightly premature cav move, and a reload.

Empire turn a dud.

Roll 2: 2:12, 3:7 pips.

Prussians turn a dud and an inf move, move all three groups. Turn two more reloads.

Empire turn officer check, bring up their HQ. Turn dud.

Roll 3: 7:7, turn ends.

The Prussians stole a march or two on the Empire... I just need to remember that their right wing is now a move ahead of the rest from the heroic moment.

Samstag, 16. Mai 2020

Piquet game 4: the setting


After two fleeting skirmishes (here and here) I feel like trying another linear battle, with all the march and evolution from columns to battle lines included.

I still don't have the full historical OOBs from the battle of Zinna painted up yet, but will try to use the historical unit values this time to reflect some of the differences between the involved armies.

The battleground is pretty open, with low hills, except for some steeper hills and trees on one edge. I will ignore the low hill edges for movement and only use them for line of sight and an uphill melee modifier. The steep hill edges stop move and are half move to cross, but on any movement card and without command penalty.


I will let the Prussians enter from the top right corner of the table in a single column. They will come in in three brigades:
1. Right wing with Wunsch, Plettenberg Dragoons and the 2 batallions Hessen-Kassel
then army HQ
2. Left wing with Salmuth, Hoffmann and the Dragoons
3. Reserve with the two grenadier batallions

The Reichsarmee will march in from the bottom left, with two parallel columns
1. at the very rear of the table: right wing with the Grenzers, Ansbach Dragoons, the converged grenadiers of Mainz &Co, Ferntheil and the 4th batallion of Mainz
2. followed by the reserve of the other converged grenadier batallion and Kurpfalz guards
3. in front of them, marching on the near end of the large hill, the left wing of the remaining 3 batallions Mainz and the Hohenzollern cuirassiers.

Mittwoch, 13. Mai 2020

Piquet game 3: the story


As last time, I want to wrap up the blow-by-blow game reports for my last game (here and here) into a quick photo story.

The scenario: after the last engagement, a small Empire corps keeps following a retreating Prussian corps (OOBs here). The Prussian rear guard is just leaving their night quarters when the Empire van appear on the other side of the table.

As always, click on the pictures to see a larger version.

In front of the building, the Prussian rear (Frei infantry and Hussars) have turned around to face the Empire vanguard (Grenzers and a converged Grenadier batallion) while the first Prussian units return to the table from the left table edge.
What I like about the rules of Piquet (or Shako, for that matter, with its special rules for marching to battle in the SYW rules option) is that they allow you to play out the historically critical part of battles that happens before the actual shooting. Who turns more move cards at the right time, and can bring his units to the table and unfold them into battle lines before the other side is ready?

The first race was to see whether the pursuing Empire troops would be able to charge the retreating Prussians before they could organize themselves. Spoiler: they wouldn't...

In the center, the Empire Dragoons threaten to attack the Prussian rear guard, but they have managed to face the Empire with their cavalry protected by a skirmisher screen.
While the first units on the table face each other, both sides are starting to bring more units onto the table.

On the left table edge, the Prussian HQ brings up the first Fusilier battalions
From the right table edge, the Kurpfalz guards are the first reinforcements marching onto the table.
After some hesitation, the Dragoons took heart and charged the Prussian rear, hoping to force a breakthrough while the Prussian main wasn't ready. It didn't go well.

The Wunsch skirmishers receive the charging cavalry with a crushing volley, killing one Dragoon stand and disrupting the attack.
After some more units came on the table, the Prussian Hussars counter attacked the Ansbach Dragoons and swept them off the table.
Situation at game end
With both sides firmly established on the table, both HQs remember their original goal for the day - avoiding a useless larger engagement and just staying on the move.